|
|
|
| | Each one of these sections includes a bunch of illustrations and screen shots so they may download a bit slowly on slow connections. |
For a single file, printable version version of these instructions, click here. Note that the file which next comes up will NOT have the menu on the left side, and may take a little while to load. |
 |
SVD-CP Interface Description |
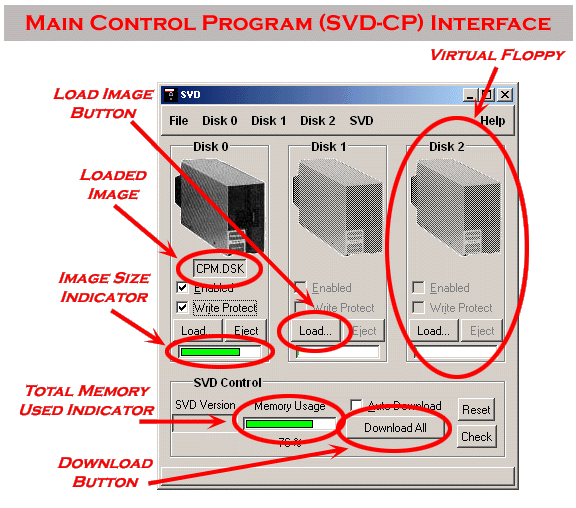
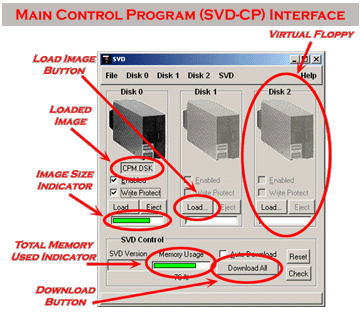
| The main interface for the SVD-CP is shown here to the left.
Click on the picture for a close-up view.
Virtual Floppy |
Three individual virtual floppies are supported by the SVD-CP.
Each corresponds directly to the equivalent floppy drive as
in both the hardware and vintage computer software.
To use the SVD, you first load a floppy image into one or more of the virtual
floppies, then download the virtual floppies to the SVD.
|
Load Image Button |
Clicking the Load Button allows you to select a floppy
image to load into the Virtual Floppy.
See below for more information on loading.
|
Loaded Image |
Below the floppy drive illustration in each virtual floppy
is a field where the name of the loaded image will be displayed.
If you are using individual file(s), this field will display "mixed files".
If you have uploaded an image, this field will display "upload".
|
Image Size Indicator |
Each virtual floppy includes a memory usage gauge.
It indicates how much of the SVD memory will be used by the loaded floppy
image.
|
Total Memory Used Indicator |
This indicator totals up all memory used by each image.
If it turns red, this means that the loaded and enabled
images are too large for the SVD.
In this case, you will NOT be allowed to download the images.
|
Download Button |
After loading the desired virtual floppies,
press the Download Button to send them to the SVD.
|
|
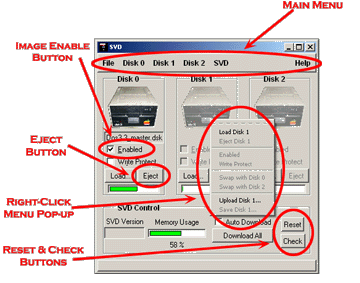 |
Main Menu |
All functions can be accessed from the Main Menu,
including program set-up and virtual floppy set-up and loading.
|
Image Enable Button |
After you load an image into a virtual floppy, it is by default enabled.
This means that it will be downloaded when you next click on Download All.
If you disable an image, it will stay loaded in the virtual floppy
but will not be downloaded.
Note that the Total Memory Used Indicator will reflect the memory
used by the enabled images only.
|
Eject Button |
Click on this button to eject (or unload) an image.
|
Right Click Menu Pop-up |
If you right-click on a virtual floppy, a short-cut pop-up menu
appears. From this menu you can access all of the same functions
that you can from the Main Menu.
|
Reset & Check Buttons |
Use Reset to reset the SVD, often gaining control again when something
has gone awry. Note, however, that this button may not work and you may need
to press the physical reset button on the SVD.
All images will be erased from the SVD when you press this
button. You will need to download them again.
Use Check to see if the SVD is connected correctly and responding.
The currently loaded images are not erased from the SVD when you press this button.
|
|
|
| | Each one of these sections includes a bunch of illustrations and screen shots so they may download a bit slowly on slow connections. |
For a single file, printable version version of these instructions, click here. Note that the file which next comes up will NOT have the menu on the left side, and may take a little while to load. |
|